A broken garage door cable can stop your door from working right and create safety hazards. At the time cables snap or slip off their drums, your whole system might stop working completely. These parts tend to wear down and break as time passes, so you’ll need to fix them right away.
Our team at Dynamic Garage Doors Inc. knows that working cables are vital to keep your garage door running smoothly. Everything in your door’s system – the springs, cables, and pulleys – must work together perfectly. The system just needs exact specifications, like the 29 to 31 quarter turns typically required to reset torsion springs. On top of that, it’s dangerous to handle these repairs without proper knowledge because cables and springs can cause serious injuries if mishandled. Our professional team stands ready to help if your garage door cables act up in Palatine or nearby Chicagoland suburbs – just call us at 877-213-9571. In this piece, we’ll walk you through the steps of replacing garage door cables, from cutting the power and securing the door to making sure cables line up correctly on drums and pulleys.
Safety must be your top priority before you start any garage door cable repair. Taking the right precautions can save you from serious injuries and property damage that often happen when people mishandle these high-tension parts.
You should always disconnect your garage door opener’s power first. This crucial step keeps the door from activating by accident while you work on it. Just unplug the opener from the electrical outlet or turn off the circuit breaker. You’ll need to find the emergency release cord if your door gets stuck during power outages. Look for a red T-shaped handle.
Once you’ve cut the power, lock the door fully open with locking pliers. A single-width garage door weighs about 150 pounds (68 kg). This heavy weight makes it vital to secure the door properly—never let it fall unexpectedly.
The door needs to be closed before you pull the emergency release cord. The door might crash down and hurt someone or damage itself if you disengage the opener while it’s open.
You can’t work on torsion springs without winding bars. These special tools help you safely adjust garage door spring tension. They’re made of strong steel, usually 18-24 inches long with a ½-inch diameter. These bars give you the control you need to handle high-tension parts safely.
Spring adjustments without proper winding bars can be deadly. Torsion springs pack enough energy to cause very serious injury or death if they release suddenly. That’s why pros always use two bars when they work on garage door springs.
People who use proper winding bars say it makes a tough job much more manageable. But this doesn’t mean you should try repairs yourself.
Many people skip proper safety gear. You need safety glasses and heavy-duty gloves to protect yourself from sharp edges and sudden movements. Never stand under the garage door while you work on cables or springs.
Trying to replace springs or cables without training is dangerous. Garage door springs stay under intense tension, and you could get hurt badly if you don’t handle them right. Cables hold up the door’s weight—a heavy door can drop fast if they break under pressure.
The safest choice is to call pros if you see frayed cables, misaligned sensors, or other problems with your garage door. Our technicians at Dynamic Garage Doors Inc have the right training to handle garage door cable repairs in Palatine and throughout Chicagoland. Call 877-213-9571 for expert help instead of risking injury with DIY repairs.
Your garage door’s mechanical components need proper understanding to spot when you need professional cable repair. The door’s operation depends on how cables and springs work together. Each system needs its own maintenance approach.
Garage doors use two main types of spring systems: torsion and extension. You’ll find torsion springs mounted horizontally above the door opening. These springs store energy by coiling around a shaft. They create torque through cable drums attached to each shaft end, which helps distribute weight evenly and makes the door move smoothly. Extension springs work differently. They run perpendicular to the door among other horizontal tracks and store energy through stretching. A pulley system connects these springs to cables that attach to the door’s bottom brackets. Torsion springs last longer and look better, but garages with limited headroom might need extension springs.
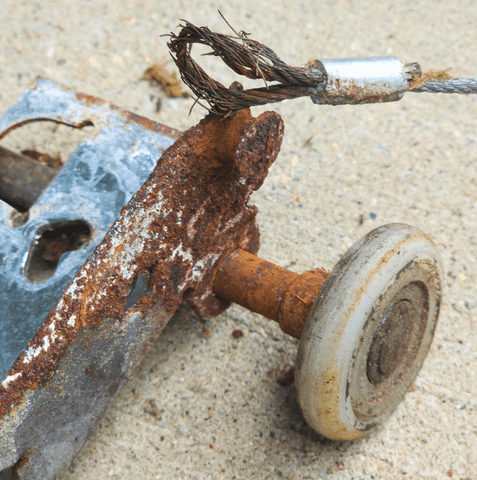
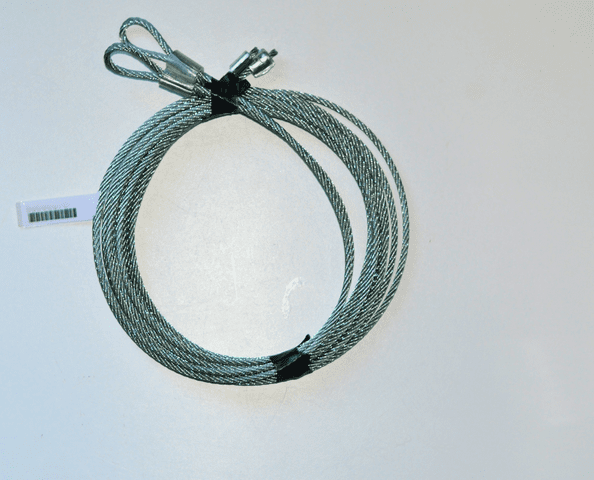
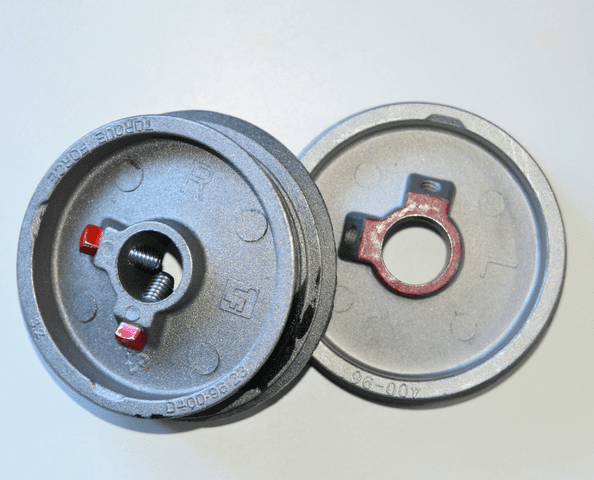
Cables connect the springs to the door. Steel cables in torsion systems wrap around grooved drums as the door moves up and down. These drums keep cables from tangling and help spread tension evenly. The drums’ grooved design lets cables move smoothly, which reduces wear and makes them last longer. Extension spring systems use pulleys to transfer spring energy that lifts the door. Everything must line up perfectly—the system fails if cables slip off drums. Our technicians at Dynamic Garage Doors Inc. know how to fix cable-drum alignment issues throughout Palatine and all Chicagoland suburbs. Call 877-213-9571 to get expert help.
Watch for these warning signs that show you need professional help:
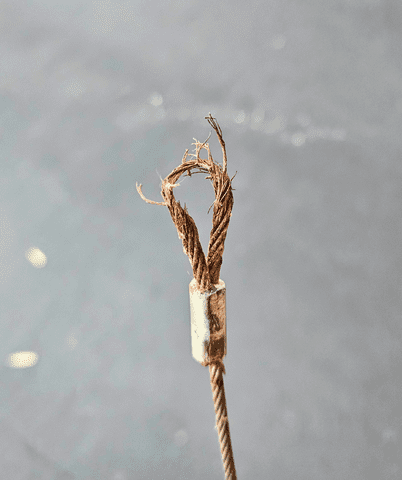
A loose cable or one that hangs from the bottom bracket means complete failure—call right away. These components stay under high tension, so trying to fix them yourself could lead to serious injury.
Professional technicians use systematic procedures to handle garage door cable problems. They prioritize safety and ensure your door works properly.
Professional technicians start by securing the door with locking pliers or a sawhorse. This prevents any unexpected movement. The door needs to be raised halfway with torsion springs to access the drum notch easily. The technician carefully rewinds the cable on the spool in the right direction after securing the door. The door gets leveled by adjusting the opposite side manually before reattaching the cable to the bottom bracket. This systematic approach employs the pulley system's mechanical advantage to safely manage the spring's tremendous force.
Technicians begin by cutting power to the opener and engaging the manual release. The door must be secured with clamps or vice grips to prevent accidents. The next critical step requires specialized knowledge and equipment to release tension from torsion springs. The old cables come off both drums and bottom brackets once tension is gone. The technician threads new cables through the system and attaches them to bottom brackets. The final step involves winding cables around drums following the original setup pattern.
Balanced door operation depends on careful cable tension adjustment. The technician positions drums precisely on the torsion tube while keeping equal tension on both sides. The right tension matters - loose cables make the door uneven, tight ones fail early. Dynamic Garage Doors Inc.'s experienced technicians spot tension problems by watching door movement patterns. Expert cable tension adjustment services are available throughout Palatine and Chicagoland suburbs at 877-213-9571.
Complete cable replacement becomes necessary when:
Simple reattachment might work if cables just slipped off drums without damage. In spite of that, technicians inspect the whole system during service calls. This helps identify mechanisms causing cable problems.
Professional garage door cable repair ends with crucial testing and adjustments. Expert technicians follow specific protocols to check if repairs are done right. This step will give a safe and lasting solution.
Door balance testing plays a key role after installing new cables. A well-balanced garage door should hold its position when lifted halfway. The technicians at Dynamic Garage Doors Inc. first disconnect the opener to test the door manually. The door should move up and down smoothly without much effort. The door needs more adjustments if it drops down or pulls up by itself. These signs point to wrong spring tension.
To check the balance:
The door might slam shut or shoot up quickly if it’s not balanced right. This can damage your property. The safest option is to call professionals at 877-213-9571.
The right spring tension helps the door work smoothly. The drums must line up correctly to keep cables from slipping. Dynamic Garage Doors Inc. technicians in Palatine and Chicagoland suburbs make sure cable drums sit properly on the torsion tube. They check for equal tension on both sides.
The experts watch that cables stay secure in each drum’s slot during the whole process. The cables must stay in the groove as the drum turns. A misaligned door will work unevenly or look crooked.
The final safety check focuses on the reversal system. Technicians place a 1½-inch object (or 2×4 laid flat) on the floor under the center of the door. The door must reverse when it touches this object. The team also checks that:
Your garage door should work perfectly after cable repair. If you notice any problems, call Dynamic Garage Doors Inc. at 877-213-9571. They serve Palatine and all Chicagoland suburbs professionally.
Garage door cable repair is crucial to keep your garage door system safe and working properly. In this piece, we showed how cables, springs, drums, and pulleys must work together perfectly. Safety remains, without doubt, the biggest concern when working with these high-tension components. Professional technicians have specialized tools, knowledge, and exceptional experience to handle these dangerous repairs safely and make them work.
The risks of DIY repairs outweigh any money you might save by a lot. One mistake during cable replacement or tension adjustment could lead to severe injury or damage your door system further. Professional help should be your first choice when garage door cable problems appear.
Testing after repairs needs technical expertise to check proper balance, tension, and arrangement. Our team at Dynamic Garage Doors Inc uses strict protocols that ensure every repair meets the highest safety and performance standards. Call Dynamic Garage Doors Inc 877-213-9571 if you see frayed cables, uneven door movement, or strange noises from your garage door system.
Regular maintenance helps prevent major cable failures. Our professional technicians who serve Palatine and all Chicagoland suburbs can spot potential problems before they become dangerous. Your garage door is a big investment and a key part of your home’s security system—it deserves expert care and attention.
Garage door cables generally last between five to seven years, depending on usage and maintenance. However, it's important to have them inspected annually for signs of wear and tear, such as fraying or broken wires.
Signs include visibly frayed or unraveled strands, exposed cable cores, uneven door opening, unusual noises during operation, rust or kinks along the cable, and slow or jerky door movement.
No, it is not safe to open a garage door with a broken or loose cable. Doing so can cause the remaining cables to snap due to excess tension, potentially leading to the door falling and causing injury or damage.
While it's possible, it's not recommended to replace garage door cables yourself. The task involves working with high-tension components that can cause severe injury if mishandled. It's safer and more effective to hire a professional technician who has the proper tools, knowledge, and experience to perform the repair safely.
Dynamic Garage Doors Inc. proudly serves Palatine and the following Chicagoland suburbs:

Dynamic Garage Doors Inc. | Professional Garage Door Services
Serving Palatine and all Chicagoland suburbs
Our expertise of international standards provides you services of garage door repair and installation along with the repair and installation of the garage door opener.